Getting Started
Installation/Usage
Via docker
Example .. code-block:: shell
$ docker run –rm -it -v $(pwd):/app -w /app kj187/stackformation:latest setup $ docker run –rm -it -v $(pwd):/app -w /app kj187/stackformation:latest blueprint:deploy
Or if you use lambda with golang for instance
For more details, see https://hub.docker.com/r/kj187/stackformation/
Using the phar
Grab the latest release from https://github.com/AOEpeople/StackFormation/releases/latest or use this shortcut (requires jq to be installed)
$ wget $(curl -s https://api.github.com/repos/AOEpeople/StackFormation/releases/latest | jq -r '.assets[0].browser_download_url')
Tip
If you want to use StackFormation globally:
$ mv stackformation.phar /usr/local/bin/stackformation
$ chmod +x /usr/local/bin/stackformation
Quickstart
AWS access keys
Execute the setup command to add all necessary AWS env vars
$ vendor/bin/stackformation.php setup
Add it to your gitignore: echo .env.default >> .gitignore
Create a blueprint
Create a blueprints.yml in your project directory:
blueprints:
  - stackname: my-stack
    template: my-stack.template
Create a CloudFormation template
Create a CloudFormation template my-stack.template in your project directory:
{
  "AWSTemplateFormatVersion": "2010-09-09",
  "Resources": {
    "MyResource1": { "Type": "AWS::CloudFormation::WaitConditionHandle" }
  }
}
Deploy your stack
$ bin/stackformation.php deploy my-stack
Kickstart a project
Imagine we are starting from scratch, on a so called green field.
$ mkdir DemoProject
$ cd DemoProject
Installation
First of all, we have to install StackFormation, for this demo we will da that via composer
$ composer require aoepeople/stackformation
Your first level project structure should be looking like that now
├── composer.json
├── composer.lock
└── vendor
To check if StackFormation is working properly execute the following command
$ vendor/bin/stackformation.php
You should see all available StackFormation commands and options now.
Required environment settings
Execute the setup command to add all necessary AWS env vars
$ vendor/bin/stackformation.php setup
Add it to your gitignore: echo .env.default >> .gitignore
Short check
If your access and secret key are correct and the user behind that have enough permissions, you are now able to use the whole magic of StackFormation. Just a quick example, you want to know what and how many ec2 instances are currently running?
$ vendor/bin/stackformation.php ec2:list

Your first blueprint
Create a blueprints.yml in your current directory:
blueprints:
  - stackname: my-stack
    template: my-stack.template
Create you CloudFormation template my-stack.template:
{
  "AWSTemplateFormatVersion": "2010-09-09",
  "Resources": {
    "MyResource1": { "Type": "AWS::CloudFormation::WaitConditionHandle" }
  }
}
Deploy your stack
$ vendor/bin/stackformation.php deploy my-stack
The output should be the following
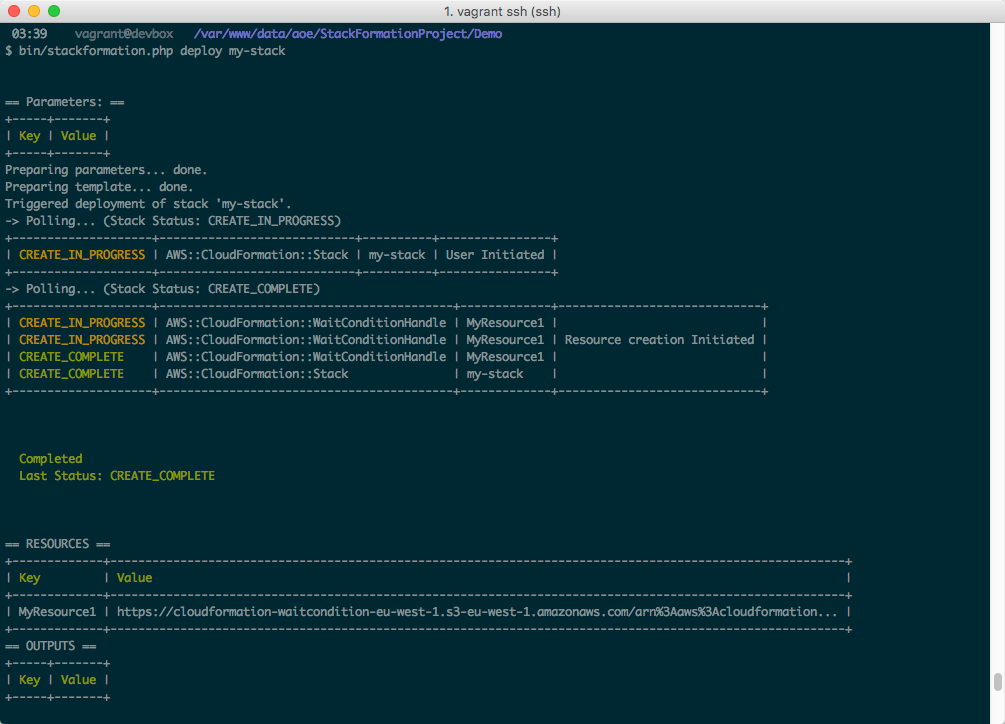
$ vendor/bin/stackformation.php stack:list
